Personal Wellness Water System™
Follow These Simple Steps to Get Started:
Hand wash the bottle and cap with warm water and a mild detergent. Rinse well. Rinse the outside of the filter with warm water only.
- DO NOT place the filter or the bottle in a dishwasher.
- DO NOT dry inside the cap. Keeping the seal moist will help seal the cap tighter and avoid leakage.
Flushing Instructions:
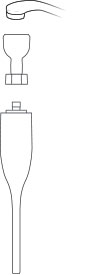
- Unscrew the cap from the bottle. Remove the cap and the attached filter from the bottle.
- Unscrew the filter from the cap.
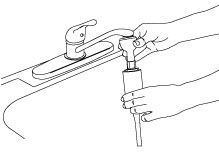
- Attach the filter to the flush bulb by screwing the filter onto the wing nut. Do not overtighten. If your version does not include a wing nut, please connect to filter using hand pressure.
- Press the flush bulb assembly onto a standard water faucet. Turn on the cold water slowly while holding the bulb in place. Let the cool water run through the filter for up to two minutes. We recommend not to drain the water out of the filter. This will help ease water flow when you first start sipping. See illustration below.
- Remove the filter from the flush assembly.
To ensure proper performance, repeat the flushing process occasionally.
Filling Instructions
- Fill the bottle to approximately 1½″ from the top to allow for water displacement. (This product is intended to be used with U.S. municipal tap water.)
- Screw the cap back onto the filter. Tighten only until snug. Do not overtighten.
- Place the filter-cap assembly into the bottle and tighten the cap. Note: we recommend that you do not dry the inside of the cap. Keeping the seal moist when tightening the cap will ensure a better grip and help avoid leakage.
- While wrapping your fingers fully around the black ring of the cap, tighten it securely to avoid leakage.
- Flip the straw on the cap up to its fullest extent, and—holding the bottle upright—insert the straw into your mouth and sip the water.
